Workspaces can be a perfect mix of productivity and personality. Whether you’re in a dedicated office space or working out of your home or garage, DIY Hairpin Legs Original Hairpin Shelf Brackets can help you to put all of your favorite objects within reach. Workhorse or showpiece, these versatile shelves can be built and hung in about an hour, using a few simple materials.

Materials List
For this project, we went with two 0.75” x 9” x 30” shelves, but you can easily adjust your shelf orientation and materials to fit your project.
- 2 – Pairs DIY Hairpin Legs Original Hairpin Shelf Brackets / Floating Desk Brackets in desired size and color (see below)
- 2 – Pieces of quality wood board (we used oak), cut to desired size (see below)
- Stud finder (optional)
- Tape measure
- Level
- Pencil
- Painters tape (optional)
- 8 – Screws
- Screwdriver / drill
- 8 – Wall anchors (if brackets don’t line up with studs)
- Polyurethane (or finish of your choice)
- 220-grit sandpaper
- Foam poly brush, paintbrush or clean rag

Step 1: Choose Your Hairpin Shelf Brackets & Shelf Size
With a variety of different sizes and finishes to choose from, there are a few things to consider when selecting your brackets and the wood boards for your shelves. These hairpin brackets can also work as a floating desk.
What color or finish do you want?
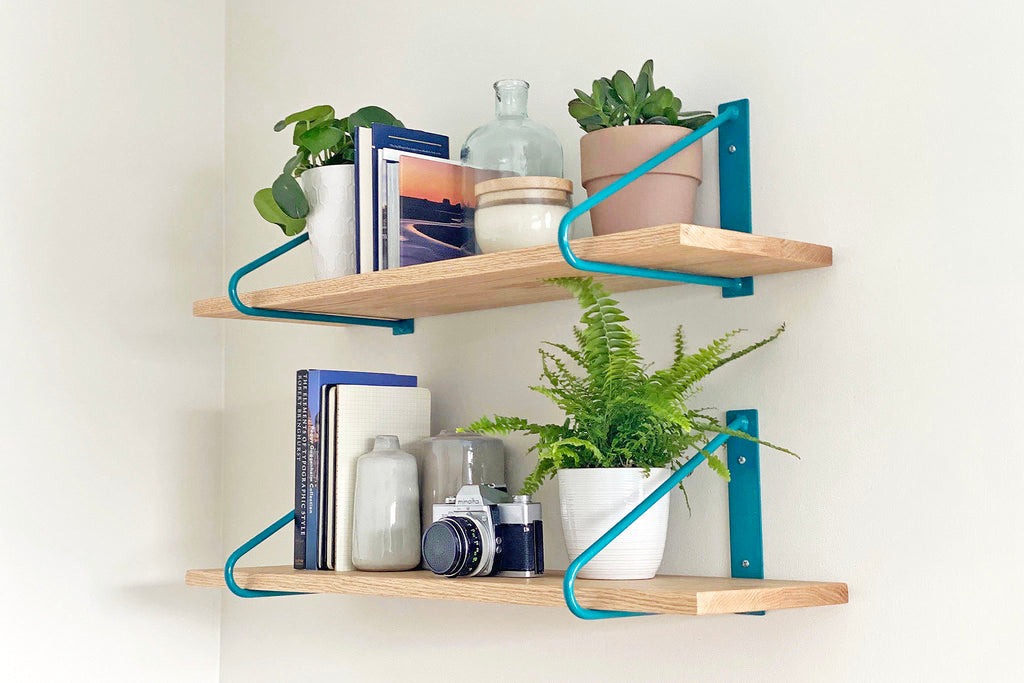
There are over a dozen colors you can choose from, but we wanted to match our shelf brackets to the original blue paint on an old Toledo chair we had fixed up. We selected teal for our brackets, but weren't sure how the color would work out. Fortunately, it was vibrant without being overpowering, and complimented the chair perfectly!

How do you want to hang your brackets?
The Original Hairpin Shelf Brackets can be hung two different ways, giving you even more options for personalizing your space. Either rest your wood board on top of the brackets, or slide it through.

How you hang your shelves will affect your wood board size and how far apart you space your brackets. For example, with the Original Hairpin Shelf Brackets in the 8-inch fit size, we found the wood board needed to be wider when placed on top of the brackets (0.75” x 11.25” x 30”) than it did when sliding it through the brackets (0.75” x 9” x 30”).
When resting your shelves on top of the brackets, keep in mind that they’re held in place by gravity. So if you really knock into them, things can shift. When choosing to rest your shelves on top of your bracket, it’s probably a good idea to hang them higher up on your wall or away from high-traffic areas.

Step 2: Determine Where You Want to Hang Your Shelves
Once you know what size shelves you’d like and how you’d like to hang your Original Hairpin Shelf Brackets, the next step is measuring them out. Painters tape offers a good visual without having to patch holes or repaint if you don't like where your shelves end up. Typically, you’ll want to hang your shelves at eye level, and align them to the middle of nearby objects such as windows or artwork.

Another consideration is what you’d like to put on your shelves. Will you be placing books or objects of a certain height such as plants, pottery, or pictures? If you’re sliding your wood board through the shelf brackets, do you need to space your brackets further apart to make more room for your objects?
Once you have an idea of your finished shelves, you can determine the right spacing and make adjustments as needed. For example, we hung our 30-inch shelves about 12 inches apart, with the brackets placed about 4.5 inches from the left and right shelf edges.
Step 3: Hang Your Hairpin Shelf Brackets
To hang your shelf brackets, use a stud finder to locate your wall studs. If your placement falls over your studs, you're in luck, and can mount the brackets directly to the studs using screws. If they don’t quite line up, mount wall anchors before screwing your shelf brackets in.

Our studs didn't line up with our brackets, so we selected drywall anchors. You'll want to choose anchors that work for your wall material, the weight of your shelves, and the objects you'll be placing on them. Bonus tip: Although anchors will have maximum weight limits, it is generally advised that you use only ¼ to ⅓ of the allotted weight. Use a level as you measure to ensure everything is straight, and install your anchors as directed.


Step 4: Finish Up Your Wood Shelves
After mounting the brackets, it’s time to divert attention to the wood. Choose the stain, paint or finish you like best, and apply as directed. We sanded our oak boards with 220-grit sandpaper, then applied a simple clear polyurethane for durability.

Once your wood boards are dry, you can place your shelves on or through your brackets. And just like that, hairpin shelf brackets!
