If we’re being honest, attaching hairpin legs ranks pretty low on the DIY difficulty scale. Sure, if you’re sourcing an exotic piece of raw wood that you’re sanding and treating, or building a custom pattern or design, that ups the ante. But hairpin legs are otherwise pretty straightforward. Floating shelves, on the other hand, have always carried an air of intimidation, at least to us.
I mean, look at them: they’re just so ...cool. But of course, anything that looks effortless and minimal is usually anything but. The easiest method for floating shelves is obviously, to buy pre-made shelves, but we were ready for a challenge. And besides, we needed a custom length for our designated space.
Materials:
(2) 30” Floating Shelf Brackets

(2) 2” thick, 36” length, 9” depth white oak
Tools:

Belt sander (using 80 & 120 grit belt)
Orbital sander (using 80, 120, 180 grit pad)
Power driver
Cordless drill
Eyelet
5/8” drill bit
5/16” drill bit
Drill extender
3/8” hex head driver
Level
Stud finder
Tape measure (we used a ruler)
Pencil
Hardware:
(8) Drywall anchors
(8) 10# 2” wood screws
We got lucky at our local lumber yard and found perfect white oak for our floating shelves. You want your wood to be at least 7” deep since the rods are 6” long and 5/8” diameter. These needed some heavy TLC as you can see in these before and after shots. We used a belt sander first, and finished up with an orbital sander until you could run your hand all over without fear of splinters.

Applying a protective coat is recommended, but part of the reason we took more time and effort into sanding the wood was that we knew we wanted to forego applying anything to the wood: the raw look is what we specifically wanted, and because these shelves were going to be used for decorative items, we weren’t that concerned about stains or wear and tear.

Prior to drilling or affixing anything into walls, you will need to mark the placement of both the wall plates and the wood. This is where your stud finder comes in. Lightly mark where the studs are with a pencil. Hold up your shelf plate to the wall (an extra set of hands is very helpful here, since you will need to make sure the plate is level while marking where you will want to drill) and again mark where/how you want to space the drilling. If you’re lucky, you will find a stud or two, but if not, that’s ok, that’s what drywall anchors are for.


On one shelf, we used four heavy duty anchors designed to support 159 lbs each. On the other, we found two studs, and used two additional drywall anchors. These shelves are decorative, but the wood we chose was heavy so we wanted to make sure we provided the proper support.

For the sake of transparency: we were pretty nervous about drilling the holes. We’re amateur DIYers at best, and admittedly, with 7th grade shop experience in drilling. There are various jigs and tools available to ensure a straight drill, and we chose a very DIY method: using an eyelet balanced on the drill bit as a leveler (if you're drilling at an angle, the eyelet will droop). This added to our nervousness, but we drilled slowly and stopped at regular intervals to make sure we were drilling straight.

We used a 5/8" drill bit and a drill bit extension because the rods that insert into the wood is 6" long.

Note: Before you drill any parts of the floating shelf brackets into the wall, you want to make sure the rods fit into your freshly drilled holes (trust us, you do not want to be doing this for the first time when the rods are already on the wall). We definitely needed a few drilling adjustments to get the holes just right.

Once we tested that the rods did indeed slide in and out of the holes easily, we assembled the rods to the wall plate: the screw on one side of the plate, the rod on the other, and tightened until there was little to no wiggle. You will need to tighten the bolt using a 3/8" Allen wrench.

Again, an extra set of hands to assist holding up the floating shelf brackets (wall mount + rods) as you drill is incredibly helpful, but also check with your leveler periodically.

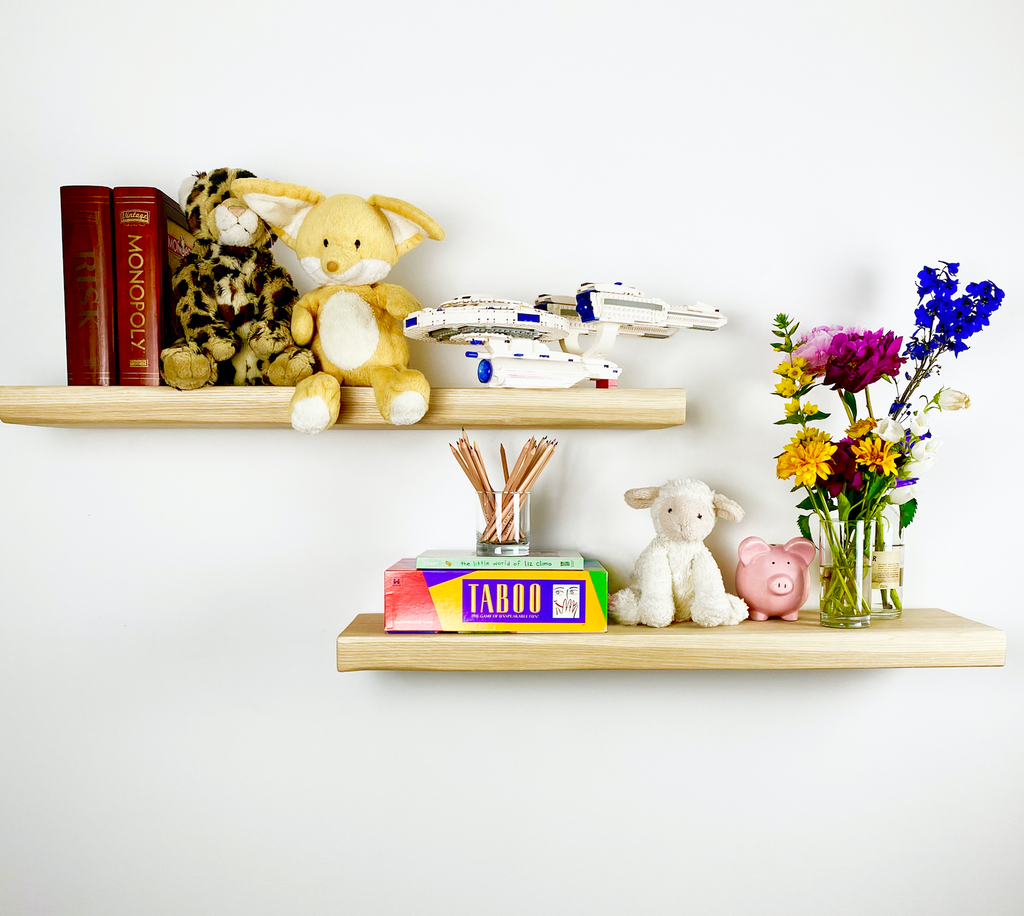
The moment of truth: sliding the prepped wood shelf into the brackets and rods. If you’ve done everything correctly, the rods should slide into the corresponding holes. You may need a little shimmy here and there, but it should fit perpendicular to the wall until the brackets are no longer visible.

Magic. Floating shelves.

Were we nervous at this DIY attempt? Sure. Did it take more effort than previous projects? Of course. Are we thrilled at the end result? Absolutely. Yes, floating shelf brackets required a few extra tools, some added steps, and a few corrections here and there. But we were so happy with the end result, that we can honestly say, it was all worth the extra effort.