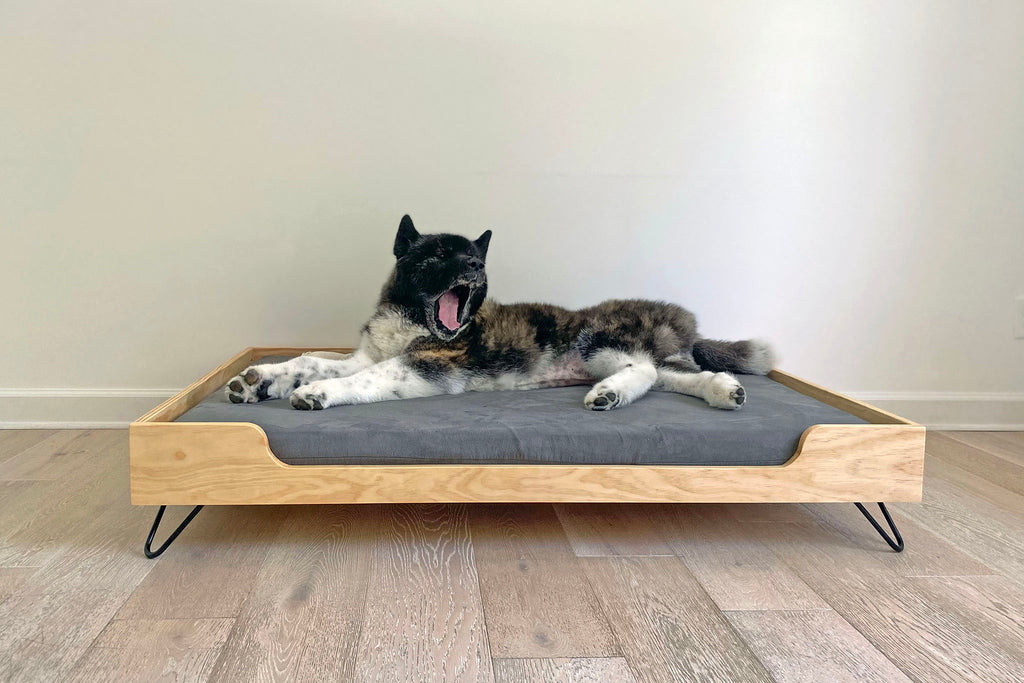
We all have our favorite places to lounge around the house—and so do our pets! If your dog has been catching z's on your couch or bed, it may be time to build them a comfy bed of their own. Here's how to put together a simple hairpin leg dog bed so that your furry friend can snooze in style.
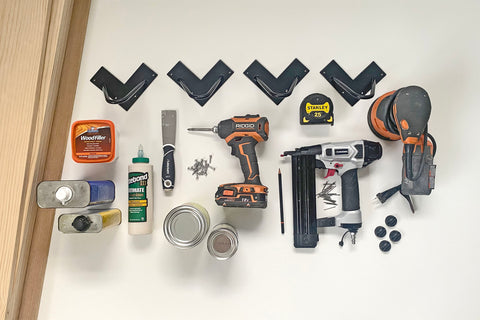
Materials List
Sweet dreams are made of wood and plywood in this DIY Hairpin Legs dog bed build.
- 1 – Set of 4 DIY Hairpin Legs, 2-Rod Design, 3/8” thick, in desired color
- 4 – DIY Hairpin Leg Floor Protectors (optional)
- 4 – Pieces of wood for the 4 sides of your dog bed, cut to size (we used pine)
- 1 – Piece of plywood for for the bottom of your dog bed, cut to size
- 1 – Dog bed cushion
- Tape measure
- Pencil
- Jigsaw + compass (or something round to trace—we used cans of food) (optional, if you'd like a curved front, see below)
- Wood glue (we used Titebond III Ultimate Wood Glue)
- Nail gun (or hammer and nail punch if you don't have one)
- Wood nails
- Wood putty and putty knife
- Palm/random orbital sander or sanding block with 220-grit sanding pads/paper
- Damp rag (or rag with denatured alcohol) to wipe away dust
- Drill/driver and bits (we used a 5/64" bit to pre-drill our pilot holes, see below)
- 16 – Screws (shorter than the thickness of the bottom of your bed)
- Painters tape (optional)
- Finish of your choice (we went with tung oil to match our DIY Hairpin Legs raised dog bowl stand)
- Foam brush, paintbrush, or clean rags for applying finish
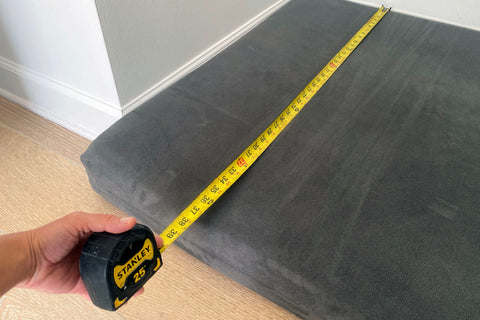
Step 1: Measure Your Dog Bed Cushion
You'll be designing your dog bed to fit around your cushion, so start by measuring the cushion's length, width and height. It can be helpful to set your cushion against a wall or corner when measuring to ensure a snug fit.
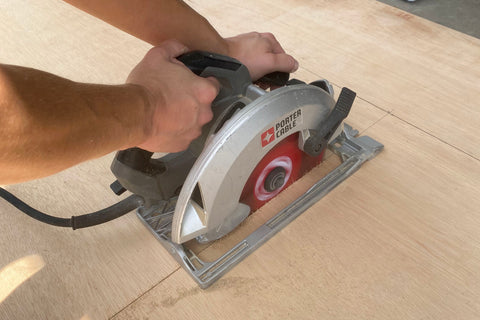
Step 2: Select & Size Your Wood Boards
You'll need five pieces of wood for your dog bed: one for the bottom, front, back, and each of the two sides. Use the actual (true) size of the wood rather than the nominal size (rough cut, listed on the label) when making your calculations. Be sure to account for the thickness of boards where pieces overlap (for example, the front and back will bookend the two sides). If you're creating a really large dog bed or your dog is on the heavy side, plan to add extra support (board or brackets) across the inside bottom of your dog bed.
Most home improvement stores will cut your boards if you ask them, or you can cut your own. We selected plywood for the bottom of our dog bed and pine for the sides, front and back. We cut the pine using a miter/chop saw and used a circular saw/SKILSAW to cut the plywood. Be extra careful when making your cuts so everything fits neatly together.
Step 3: Jigsaw the Curved Front (Optional)
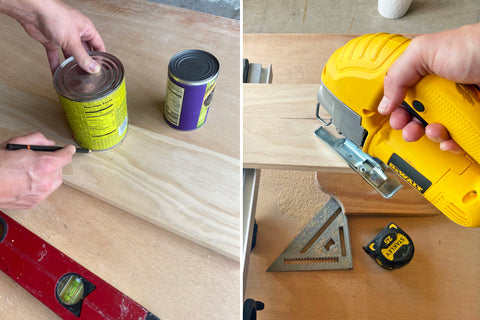
You can use a straight board for the front of your dog bed if you prefer to skip the jigsaw. If you're up for the curve, determine where you'd like it to start and end, and how you'd like it to look. We set ours in nine inches from each side, and traced two cans of food (28 oz. and 15.5 oz.) to either side of the pencil mark to create a gentle curve.
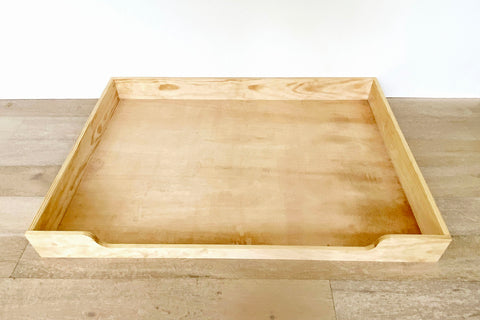
Step 4: Assemble Your Dog Bed
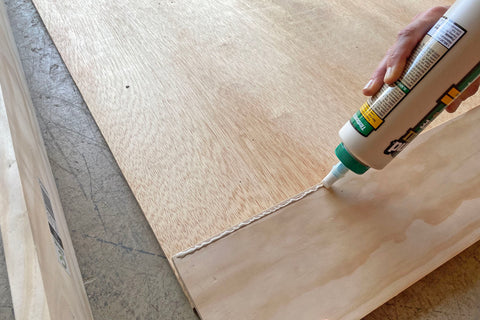
Set all of your wood pieces out so you can easily attach adjacent pieces. For each piece, lay a thin bead of wood glue down along the edge and press the pieces firmly together. Wipe away any excess glue using a rag.
Once the glue is dry, reinforce the glue with nails. You can measure and mark where each of your nails will go, or just eyeball them. If you don't have a nail gun, you can use a hammer and nail punch to hammer and recess your nails. Then use wood putty and a putty knife to cover the nail holes.

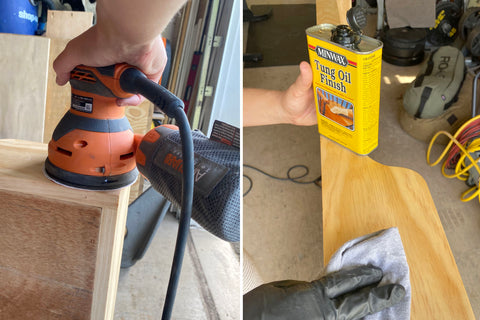
Step 5: Sand & Finish Your Dog Bed
After your dog bed is assembled, lightly sand the surfaces and edges using a palm/random orbital sander or sanding block. When everything is sanded, wipe away all the dust using a damp rag or denatured alcohol. If your dog is a chewer or likes to lick surfaces, you'll want to use a food-safe finish. We applied tung oil to match our DIY Hairpin Legs raised dog bowl stand.
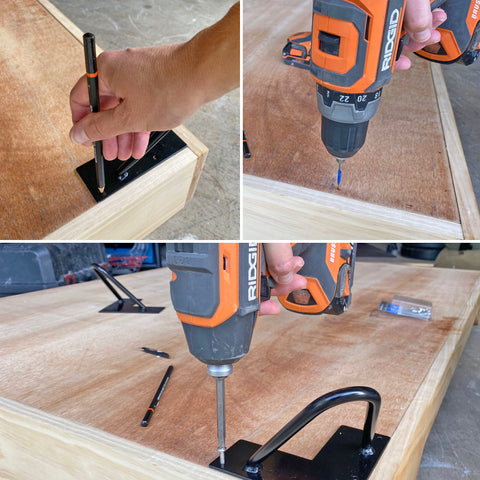
Step 6: Attach Your DIY Hairpin Legs
Adding your DIY Hairpin Legs is easy. Just position, pre-drill, and fasten them:
- Position: Turn your dog bed over and use a tape measure to position each hairpin leg evenly in each corner. Mark each base plate hole with a pencil, and remove the hairpin legs.
- Pre-drill: Pre-drilling helps to avoid cracking or damaging your dog bed. Use a drill bit that's slightly smaller than the diameter of your screws or fasteners (without the threads), and drill over each pencil mark. Marking your drill bit with a piece of painters tape can help ensure you don't drill down too far.
- Fasten: Reposition your DIY Hairpin Legs over the holes, and use a drill/driver or screwdriver to attach them to your dog bed.
After all your DIY Hairpin Legs are in place, check that they're secure. Then turn your dog bed over and add your floor protectors if needed. Whistle for your pup, show them their new modern dog bed and enjoy some well-deserved R&R of your own.
